Tuesday, July 8, 2014

Easy DIY Porch Bench


     Hey! Long time no see, right? I'm sorry, I've been crazy busy with my adventurous toddler and my new Scentsy business, but those are posts for other days. The long awaited Cement Block Bench is complete!      
     That's right, I did it! I finally finished my bench for the front porch! We'll, we, my husband helped a lot. We changed a few things from the original, making it work better for us. To make it the way we did, you'll need: 12 cement blocks, 3 5' wooden posts, cement glue, a circular saw, a quart of outdoor paint in what ever color you want, a paint roller, a paint tray, and a painters tarp.


       So first you're going to use the cement glue to glue the blocks long-ways in pairs. Let the glue set, our glue said about 2-4 hours, but we waited overnight. 


     Turn each set on it's shorter side, zig zag some more glue, then top the with a block long-ways. You should have 4 sets of 3 cement blocks glued together. Let the new glue set. 


Now we get to paint! Just take your paint roller and outdoor safe paint and go to town! I didn't paint the inside, but that's up to you. I went over each side, top and bottom. I decided to do 2 coats, but if you wanted, 1 would give you a little bit of a weathered look. (Don't mind my poor tulips, they are officially long since dead :( )


     I waited about 1-2 days to add on my second coat of  paint.    
    And now, more waiting! Just wait a few days for the paint to fully dry, we waited till we finally were able to get the wood and saw we needed to complete the bench.


      So, we decided to use those not-quite-round, not-quite-flat 8' posts. You can use round posts, you can use 4x4s, if it fits, it sits (giggle). Figure out how long you want your bench to be. We had already picked out a seat cushion, so we "set up" our bench, but the cushion down, and marked where we wanted to cut the wood. You can cut the wood like my husband did above, or whatever SAFE way you know how. And PLEASE wear safety glasses or even just sunglasses, and closed toed shoes, my husband refused to listen.

Did I mention I have a hot husband? No? Hhhmmm.

   You have your blocks glued and painted, you have your wood cut, now you just have to decide where to set it up! After a couple moves, we found the perfect spot. We put the blocks in place, put the wood in, placed the seat cushion and pillows, and...


VIOLA! 


    There it is! I am still searching for the perfect pillow to fill in that gap, but I love sitting outside on this bench, drinking my coffee (or wine, depending on the time of day) and watching Grayson run around the yard the way he loves too. I'm thinking of putting in another post in those bottom-right holes for a foot rest. And if you want your bench deeper, just add another post in the top row! I'm so glad it's finally done! I hope you can enjoy yours as much as I do mine. 


Thursday, May 29, 2014

A Nana's Mother's Day Gift

 
     I asked and you replied! A very late tutorial on a Mother's Day gift. I saw this on Pinterest oh so long ago, and decided it would be the perfect gift for my son's Nana, my mother. She is definitely one for homemade mementoes and little handprinted and footprinted items. Her favorite is little baby feet, but that wouldn't work for this project, haha. It pretty simple to make, and all you need is:


3 different colors of acrylic paints, a wide brush (for hand painting) and a narrow brush (for writing), a paper plate, and plain oven mitts.
 
 
     I took advantage of Gray passing out on his daddy, handprints are always easier with a sleeping baby. 

 
     I chose to do the handprint first not only because my son was dead asleep, but because it would be easier to write around a handprint than to fit a handprint into the writing. You'll want to have the paint you want to use for the handprint, a wide brush, the oven mitts, and some baby wipes. So, simply put a nickel to quarter sized drop of paint on your sleeping child's hand and spread it around with brush. Quickly press their flattened hand onto the center of the back of the oven mitt. You will want to work fast because this paint can dry pretty quickly. Before moving on to the next hand, wipe off your baby's hand to avoid paint getting where you don't want it.
 
 
     Now set yourself up to write on your oven mitts. You'll want your two paints, skinny brush, oven mitts, and paper plate (or bowl, whatever you like to hold your paint). You could also just use puffy paint. 


     Now write away! Whether it be for a mother, grandma, nana, aunt, you just replace "Nana" with whomever the gift is for. For example, "Mommy's Little Helper" will turn this into a gift for the child's mom. On one mitt I wrote my sons name, the other "Mother's Day 2014". Since this gift is so personalized, you can write what ever you want and can fit on your oven mitt!


    Ta Da! An easy, personalized gift for that special mother in your life. It can be decorational and functional, something to be treasured for years, long after the child has grown. As I write this, I'm thinking maybe I should put his handprints on my apron, make a stepping stone for our home here in Biloxi, another for the next house, and so on. They're only small for so long, and capturing their little handprints in paint will be looked back on for years to come.
 
"Little boy, you remind me how, so much depends on days made of now." - Allison McGhee


Friday, May 16, 2014

Chef'n Strawberry Slicer

   So, there I was at Target. Garlic chopper, yes please, olive oil mister, check. But wait, what is that? A strawberry slicer? Well that's silly, just use a knife. Then I remembered, since we started this 21 Day Fix, I'm eating about 2 cups of strawberries a day, and I like them cut up small. So I said what the heck, toss that in the cart too (Isn't it always like that at Target?).


     After my workout, it's time for my bedtime snack. Strawberries and pineapples it is. Delicius and the strawberry slicer worked beautifully. Next day, strawberries and yogurt for a snack, yumm. Then lunch time rolls around. I decide I'll have the other half of my Chick-Fil-A spicey chicken sandwich, but what veggies should I have? There's zucchini, but that's a pain to cut, and I'm soooo tired of raw baby carrots. Lightbulb! Maybe that strawberry slicer will work? I cut the zucchini into 1" chunks, stick it in the slicer, and with a little bit of work, BAM! Evenly sliced zucchini.
                               
 
     I start steaming that and decide steamed carrots sound good too, not to mention my son will probably want whatever I'm eating, so I better cook extra. I cut a carrot to size and stick it in. It won't slice. So I cut that carrot in half and try again, success! 
 
    
     Steam that all too, mix with zucchini, drizzle with olive oil & balsamic vinegar (for the record, leave out that balsamic vinegar), sprinkle some sea salt, and viola! Lunch!
                                
     
     So between 1/2 a chicken sandwich and about 1 cup of this steamed veggie mix, I'm writing this on a full stomach. I'm so glad I figured this out, considering the mandolin slicer I just bought is useless. It's a nice time saver and so much more worth that $15 now that I can use it for more than just strawberries. Any shortcuts, as a mother and as someone trying to eat healthier, are much needed and so time-saving. And honestly, neither Target or Chef'n know who I am or that I'm writing this. I literally just figured this out and had to share it with you all. I can't wait to see what else I can slice up in this thing! 

     Have you found a new use for an odd kitchen gadget? Or maybe just a tool around the house? Tell me in the comments below! 


     P.s. If you're interested in any Beach Body programs or products, you can shoot my husband a message at imenew@gmail.com


<a href="http://www.bloglovin.com/blog/12278081/?claim=fhzjkaz4jpx">Follow my blog with Bloglovin</a>

Monday, May 5, 2014

DIY Yard Mobile


     Well hello there stranger! Long time no see! Yes, that would be my fault, but I'm so glad I finally have something to post about. So, in case you didn't know, we won a yard make-over from our Community center. Davey-Tree is coming out and going to replace EVERYTHING in our front yard! New grass, out with the lava rocks and in with the red mulch, good-bye funky grass and boring bushes and hello Hydrangeas, Hostas, Lavender, Camillas, Confederate Jasmine, and Honeysuckle! Seriously guys, of all the prizes they were giving away at this event, this is the only one I wanted. Perfect timing for Mother's Day too! Moving on to the point, I have a yard to decorate. So far we have a bird bath and a white rabbit.


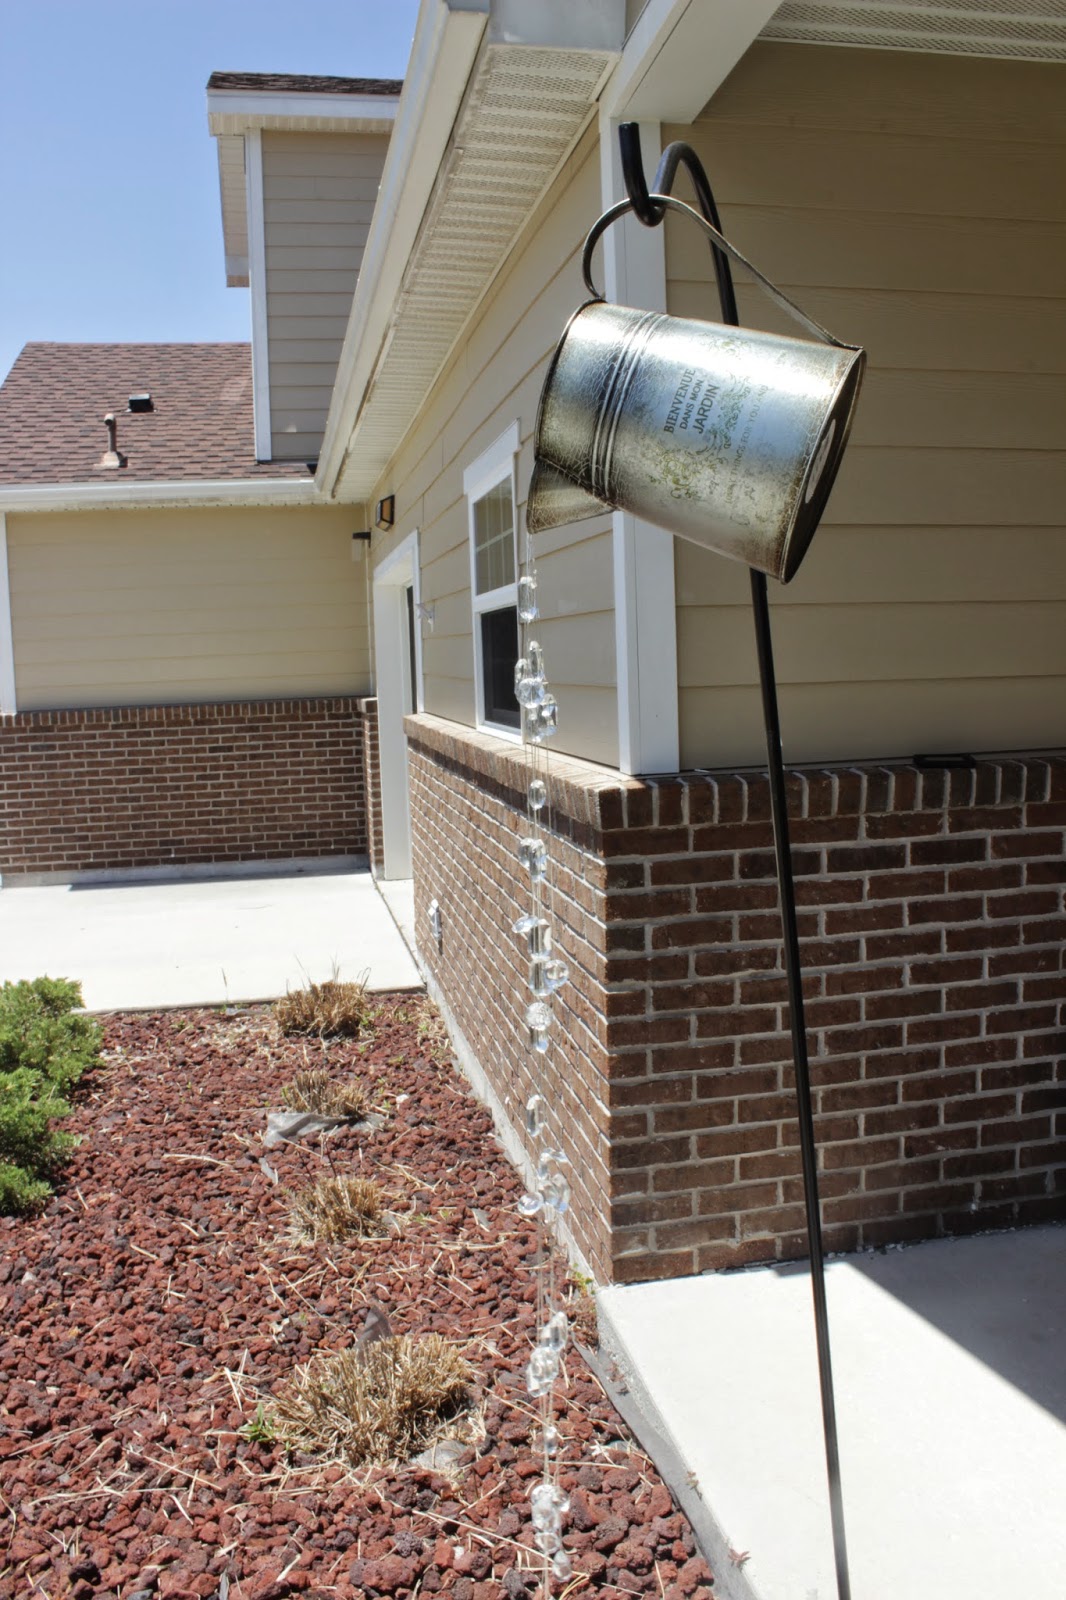
     During my Pinterest search for things to do/put in my yard, I found this. I had never seen anything like it before and was in love. The man who was selling it no longer had it in stock, so I decided to make my own. I searched around for my supplies, and ended up with this.

Clear stretchy string, Tin Pitcher, Clear beads in varying gem shapes (Michaels), Scissors, Gorilla Super Glue (My Home), and White Screw-in Hanging Hooks (BX)
 
     So to start, I cut the Stretchy string into 6 fairly even, 3' strands. I tied my tear drop shaped beads at the bottom of the string, tied a double knot 3-5" up, slid on the next bead, tied another double knot 3-5" up, slid on th next bead, and just repeated that until I had about 6" of string left.
 
 
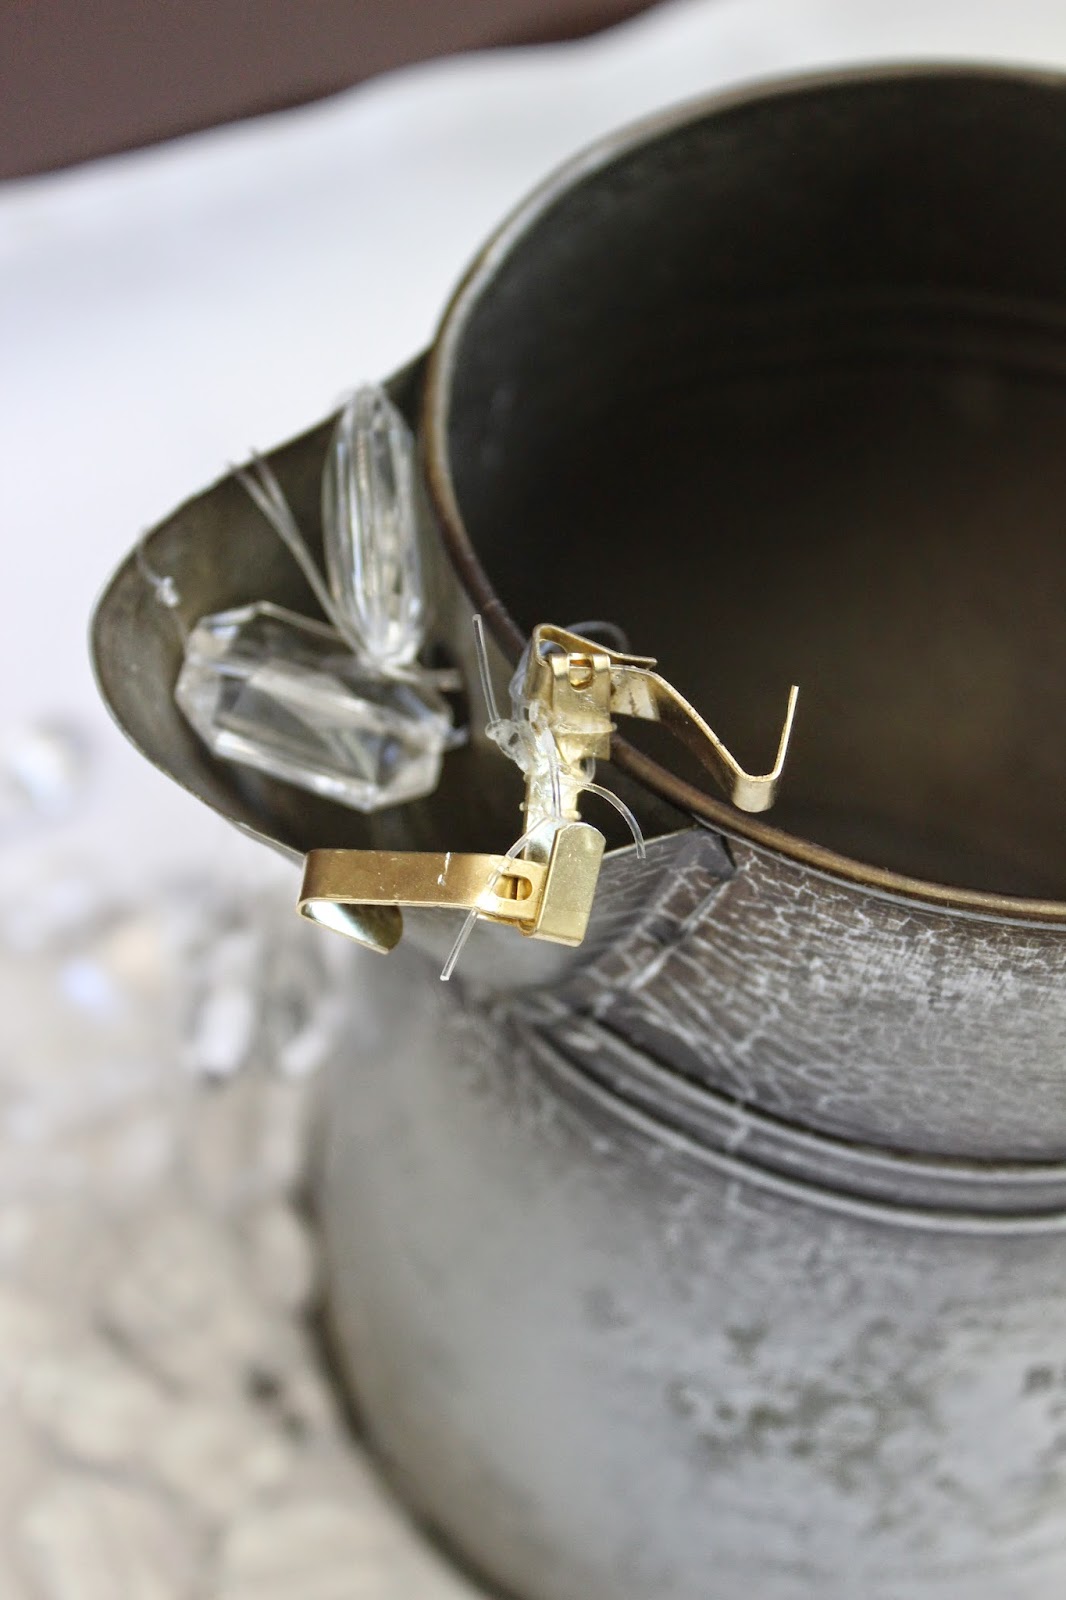
     After I had finished all my strands, I put them through the hole in the spout of the pitcher and tied and super glued them to this contraption my husband jerry-rigged.
 
 
We purchased a double shepherd's hooks at Lowes and I hung it straight on that.
 
 
     Now, things I would have done differently; I would have bought an actual watering can, where the head removes from the spout, I think that would allow the strings to separate more and look fuller. I'd also put strings in every hole in the watering can head. Instead of the stretchy string, I would get fishing string. I'm not sure how long this stretchy string will hold up outdoors, so I guess we'll see. I'm happy with the beads, although hanging these Crystals from Amazon at the ends would be so pretty. And of course, why didn't I buy a washer?! Thankfully the thing we tied all the strings too isn't too visible, but I think a washer would've been easier and just a better choice.
 
     Even though I certainly could've done it better, it still looks beautiful out in my yard. It'll look even better Once Davey-Tree finishes up my yard make-over! I can't wait to get a bird feeder out there, and maybe even move my hummingbird feeder out front too. Thank you so much for stopping by and checking this out! If you have any questions, feel free to ask in the comments below! Have a beautiful day!

Sunday, April 27, 2014

Busy Busy Busy!

 
     Man oh man! I've been working on making this thing look presentable and having an Instagram, Pinterest, Twitter, and Bloglovin for you all to look at for two days now! The Instagram and Pinterest are both pretty empty, but I'll be working on that. I'll either need to hire someone to fix this thing or quickly learn HTML code and Photoshop, I'm hoping for the first.

      So today the hubs and I started working on this project I found on Pinterest. I'm really excited to finish it and make it my first DIY post! I'm putting my own spin on it, of course. I'm bummed I can't find the original post, but it looks pretty self-explanatory.

     We're still unpacking the house, B (my husband) is doing a great job working on that. At this point its mainly just reorganizing and categorizing things until we can get a desk and book shelf's. I need to get on the closet, seeing as how we now have bedroom furniture and places to put all that stuff. I'll have to get some wine before I do that though.
I have this magnet on my fridge, for real.

    While I'm rambling, what do you all want to see on my Instagram? I think I've got Twitter and Pinterst covered, but I can't think of much for my hip-stagram (get it? Lawl).

One of these mobi sd cards from eyefi would probably make Instgraming a lot easier. I heard all about it from Jen over at All Four Love with her review of it. It's a sd card for your camera that uses WiFi to send the pictures you take straight to your computer, tablet, smart phone, anything with a WiFi connection. Pretty cool, right? #wishlist

     Whew, now that I have that pesky writing bug out of my system, I'll wrap this up! I'm thinking up theme days to do or Link up with for this next week and working on my Instagram and Pinterest. Can't wait to get back to you all!

<a href="http://www.bloglovin.com/blog/12176833/?claim=ean8sxc3f2v">Follow my blog with Bloglovin</a>


Friday, April 25, 2014

My First Post!

In the Kitchen
In the kitchen with Momma


Well here I am, almost 6 months later. Starting a blog was one of my new years resolutions, but hey, better late than never, right? Anywho, I downloaded the app for Bloglovin sometime last fall, and I have read through Venus Trapped in Mars, All Four Love, A Beautiful Mess, Operation Skinny Jeans, Pregnant Chicken, The Small Things Blog, and We Took the Road Less Traveled on a daily basis ever since. They inspired me. I'd cook something or do something in Korea (where we were living at the time) and think "I wish I had a blog were I could share these awesome things!" So here we are, in my first, awkward blog post where I just want to talk about everything. See, I have this list of blog posts in my head that have been building up since before Christmas. So now I just have to sick with it and put them out there for all of you! For now, I'll do a lil 10 things you don't know 'bout me.

1. I played tennis and was on the swim team in High School. Swim was way better.
That's me on the starting block.
That's me on the starting block!


2. In the first 18 years of my life I only ever had two addresses. Since then I've had 6. #militarylife

3. I cut my own hair when I was 2. But who didn't?

4. I love Mel Brooks. The man is the funniest, smartest, comic I've ever seen. Could he be my adoptive grandpa, please?

giphy


5. My house burned down when I was 13 in the infamous Cedar Fires. Or maybe you've never heard of it, whatevs.

6. I had kindergarten and 4th grade with my hubby, but I didn't like him till we met in High School. He talked too much, and still does ;)

Little freshman babies going to Homecoming.
Little freshman babies going to Homecoming


7. I have Type 2 Diabetes.

8. I don't like how often I use emoji's, which really isn't that much.

9. I start to sound southern when I get drunk. I'm not trying to make fun, I just like to hear my voice that way.
A lil bit of wine, a lil vodka-redbull, and a lil beer at the LSU Crawfish Boil in San Diego.
A lil wine, a lil vodka-redbull, and a lil beer at the LSU Crawfish Boil in San Diego

10. Speaking of accents, an Irish accent makes me melt.

So there we go! Stay tuned for more posts!

<a href="http://www.bloglovin.com/blog/12176833/?claim=ean8sxc3f2v">Follow my blog with Bloglovin</a>